10 Best Wedding Make-Up Tips


1;To ensure that your foundation lasts the whole day, using a primer as a base is essential. It prepares the skin for make-up and creates a protective base that foundation can 'grab onto'. Award winning make-up artist Sarah Brock Artistic Director for make-up at Daniel Sandler promises 'skin will remain shine-free and any pores or fine lines will be erased, leaving a smooth and perfect surface'.


2;Choose foundation to match your skin tone


The key to finding the perfect foundation to match your skin tone is to check the colour in natural daylight. After all, on your wedding day you are most likely to spend a large proportion of it in natural light. Remember to always check a foundation along the jaw line to guarantee you don't leave a tide-mark and extend it towards the neck. Any make-up artist will tell you the only way to apply foundation correctly is with a foundation brush, so invest in one before the big day.


3;Don't forget concealer


Although foundation will definitely give you the coverage you need to even out any blotchiness, concealer is still a bridal beauty must to get rid of any unwanted shadows that might persist after foundation application (for all the beauty sleep you get in the lead up, the night before might be a different story). Use a small concealer brush to erase dark circles.


4;Use powder to set foundation


It may seem like more make-up than you are used to, but remember that for photographs and all-day longevity, powder is essential to set the foundation and concealer. Sarah Brock, Artistic Director for make-up at Daniel Sandler says: 'Your foundation and powder should be identical shades. Use a large powder brush and dust lightly onto the face.'


5;Apply blusher


To avoid looking washed out for photographs, make sure you apply a subtle blusher to the apples of your cheeks. Smile in the mirror to ensure you pinpoint the apple exactly and gently blend the blusher upwards towards the hairline. Sarah Brock, recommends the Daniel Sandler watercolour blush (£11) to give a subtle, dewy look.


6;Use light eye shadow as base


Begin on your eyes by applying a light eye shadow all over the eyelid. This is the best way to open up the eye and make them stand out more in photographs. Then you can apply the colour of your choice from the upper lash line to the crease of your eye. Blending is the key to good make-up, so be sure you don't leave any harsh lines.


7;Opt for darker eye shadow for dramatic look


Some brides go for a darker eye shadow shade along the upper lash
line, worn as close to the lashes as possible, you can also bring this shade to the lower lash line if you wish. To up the drama stakes, apply a dark eye pencil in the inner rim of the eye.


8;Go for two coats of mascara
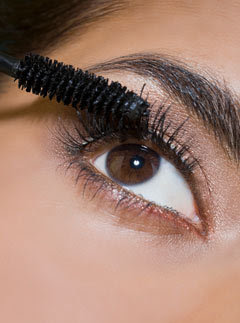

Follow the eye shading by curling your lashes for a glamorous look and then apply two generous coats of waterproof black mascara.


9;Use lip liner that matches your lipstick shade

There are no hard and fast rules over whether to opt for a lipstick or a gloss on your wedding day. Some simply prefer one to the other. Whichever you veer towards, be sure to use a lip liner similar to the colour of your choice and blend using a cotton bud to prevent the lipstick or gloss from bleeding.


10;Blot your lips


When applying your lipstick, blot your lips with a tissue after one application and then reapply to guarantee a more lasting effect. If you want a helping hand to achieve the perfect make-up on your wedding day.

Natural Remedies for Acne

Acne

Acne afflicts approximately 80% of females and 90% of males at some point in their lives. While it seems to be prevalent in the teenage years, acne can afflict a person of any age. More and more adults are being diagnosed with adult acne, but there are things that you can do if you are a victim.

While over-the-counter acne remedies can be harsh and drying to your skin, there are natural remedies for acne that are very effective.

Diet

Your diet can play an important part in keeping your skin clear and healthy. A diet that is based on fresh fruits and vegetables and unprocessed foods can be a great benefit to people with acne. Vegetables are very good for people with acne, particularly leafy green vegetables. Broccoli is great for healthy, clear skin. The best way to eat it is raw and fresh, but steamed is good too. In fact, you will find that two of the best natural remedies for acne are fresh vegetables and water. Other foods that are good for you are fish that are rich in omega 3 fatty acids and whole grain products like brown rice and whole-wheat pasta are also good. You should limit or avoid fried foods, sugary foods and foods that are high in trans fats such as milk and dairy products.

Water is integral for optimum body functions. This includes your skin. Water keeps your skin moist and supple. It keeps you looking young and feeling good. Fiber is also crucial in keeping your body functioning at its best. Most people do not get nearly enough fiber in their diet, which is why fresh fruits and vegetables as well as whole grains are so important. When your body is functioning well on the inside it will show on the outside.

Vitamin A


Vitamin A is believed to aid in reducing the production of sebum, which is what makes your skin oily and can be a factor in causing breakouts. You do need to be careful that you do not take too much Vitamin A because it can cause some health problems, but if you are eating foods that are rich in beta-carotene, vitamin E and zinc, you probably do not need to take a vitamin A supplement.

Zinc

Zinc has been shown to be very effective in preventing acne. It also helps to heal blemishes and reduces the redness and swelling that accompanies the inflammation of acne breakouts. The best method of obtaining zinc is through food. Foods that are high in protein are typically high in zinc. Beef, pork and lamb have more zinc than fish. Chicken is loaded with zinc, but the dark meat offers more than the white meat. Peanuts, peanut butter and legumes are also very high in zinc. Zinc is almost a sure bet when it comes to natural remedies for acne.

Herbal Remedies


You can concoct an herbal blend of sarsaparilla, yellow dock, burdock and cleavers and take half a teaspoon of the blend three times a day, but it must be combined with a healthy diet. The herbs in this blend are believed to be very effective in cleansing the blood and cleansing the lymph glands. Additionally, tea tree oil can be very effective when applied to acne lesions because it can help to eradicate the bacteria as well as reduce the redness and swelling of acne inflammation. These herbal natural remedies for acne have been shown to be very effective.


Tips for Healthy, Beautiful Nails


Nail Polish

Here you will find several simple quick tips that will ensure your nails are groomed and in tip-top condition.

1. Cuticles: Make sure you oil them


Do this each night before you go to bed. It will make them healthier and stronger.

2. Use blue-tinged translucent polish


It will make the pink of your nails look a deeper shade of pink and the white in your nails even whiter.

3. Regular filing

Is essential and stops nails from breaking or splitting and makes them look better, so file them all to the same length.

4. Nail buffing


Do once a week. This will increase the circulation and oxygen in the nails. Do for about two minutes each session and be careful to apply firm pressure but don’t be too hard, which can damage the nail.

5. Moisturize


Have hand cream always so you can add moisture whenever your hands are feeling dry or in need of some protection.

6. Get a white nail pencil

This is great for enhancing the look of your nails. Use the pencil underneath the edges of your nails. This will enhance color and make them look fresh and clean.

7. Nourish your nails from within


If you have any of the following then you need to change your diet.

* Lack of vitamin A and calcium causes dryness and brittleness.

* Lack of protein, folic acid and vitamin C causes hang nails.

* White bands across the nails mean a protein deficiency.

* A lack of sufficient hydrochloric acid can cause splitting nails.

* Vitamin B12 deficiency can lead to dryness, very rounded and curved ends or darkening of nails.

* Zinc deficiency can cause white spots on the nails.

* Red skin around cuticles indicates poor metabolism of essential fatty acids.

Increase the amount of calcium in your diet and also take evening primrose and an oily fish supplement to keep your nails healthy and strong.

8. Keep polish in a cool place


Don't store polish in a warm place as the polish will change consistency. Store it always somewhere cool i.e. in the refrigerator.

9. Less is more


Do not remove and reapply polish more than once or twice a week.

Why?

Because it will dry out your nails. Choosing a remover with built in moisturizer will mean you don’t have to change coats too often.

10 Hand massage


Boosts circulation and encourages healthy nail growth and is the perfect way to make your hands feel wonderful.

Incorporate the above in your beauty regime and you will have healthy and great looking nails.

How to Treat and Prevent Broken Nails


We use them as makeshift screwdrivers or pliers. We drown them in dishwater and coat them with chemicals. No wonder our nails so easily break. Everything from a dry climate to constant immersion in hot water can cause nails to peel, split, and crack. And the pain can be considerable, especially if the nail splits to the quick.

Here are some tips you can consider to help you to speed your healing process and for fast pain-relief.

Clip broken nails quickly. If you break a nail, cut it as short as you can; this will keep the break from extending farther down your nail.

Bandage the break. . .maybe. If your nail is torn and raw, apply an antibiotic ointment to help prevent infection, then cover the nail with a bandage. No need to bandage a less-serious split. A bandage will hold in heat and moisture, which can be detrimental.

Clip nails correctly. Cut your nails straight across. Rounding the edges can cause an ingrown nail.

Don gloves. When you are doing household chores, wear heavy cotton gloves for dry work such as gardening and vinyl gloves with cotton gloves underneath for wet work such as washing dishes. Your hands will sweat under the vinyl, and the cotton gloves will absorb the sweat.

Use an ocean of lotion. Massage your nails with plain petroleum jelly or a hand cream that contains 10 percent urea. Trapping the moisture within the nails will help make them less brittle.

Ration the nail polish remover. Touch up chipped polish instead of removing it completely. The reason? Nail polish remover contains strong solvents that can make nails bone-dry, leaving them vulnerable to splits and cracks.

Try biotin. The vitamin biotin, available at drugstores and health food stores, has shown to strengthen nails. It is recommended taking 2.5 milligrams of biotin a day. But do not expect overnight improvement. It may take six months to see results.

A nail that is broken seldom requires medical attention. But a nail that is injured by a slamming car door, for example, can be serious. You should see a doctor if you develop symptoms of infection, such as swelling, a fever, or the formation of pus, or if your nail is extremely painful. If there is a lot of swelling or pain, you could have a broken bone, but not a broken nail.

Also consult a doctor if you see blood under your nail. Go to the emergency room within an hour to release the pressure beneath the nail. If the pressure is not released, it can damage the nail root. But do not be alarmed if your nail turns black. It probably looks worse than it is.

How to Apply Makeup


Makeup

Playing with makeup can be great fun. It can also be a terrible disaster, especially if you don't know what you are doing — you could end up looking like Frankenstein’s ugly sister. Get the basics right, first time.

The Basics

The beauty industry has loads of beauty secrets and visiting a makeup artist for a makeover can be a great way to learn some of their tricks. But, if you can't afford a makeup artist, here are some quick tips you can start using today for flawless makeup application.

Step 1
Always ensure your face is clean before applying makeup. Cleanse, tone and moisturize before you apply your makeup. Use a warm cloth when cleansing as this opens the pores and allows you to apply moisturizer that will soak up before your foundation goes on.

Step 2
Conceal it. If you have blemishes or problem spots on your skin, cover them up by dabbing a bit of congealer over them.

Step 3
Begin your application with foundation, applying it with a clean foundation brush. This will allow you to apply foundation more easily and without wasting any. Never use your hands as they can contribute to oil and the spread of bacteria. Foundation sponges are also a good option.
Step 4
Finish off your foundation with a matching powder, blending it in circles to give your skin a finished look.

The Fun Part


Step 5

Now you're ready to play and have some fun. Starting with the eyes, begin to apply eye shadow, starting from the inside corner of your eye and blending it outwards. If you want to add some highlighting effects, apply a shimmering shade just beneath your eyebrow arch and blend it in.

You can use a trio of eye shadow that has three different shades. The lighter one would be used for highlighting and can also be applied to the inside corner of the eyelid. The second, darker shade would then be applied on the middle section of the eyelid, while the darker shade will be applied to the outer corner of the eyelid. The golden rule of applying eye makeup trios: Always blend in the shades to create a finished off look. The last thing you want is to have hard, defined color points, especially on your eyes.

Next, apply eyeliner and finish it off with mascara. Always ensure you apply mascara when you have finished making up your eyes.

Step 6

If you'd like, you can subtly apply a blusher. Don't go too dramatic. Remember, your blusher should only brighten up your cheeks, but should always look natural. Again, blend, blend, blend.

Step 7

Complete your makeup application by applying lip-liner to your lips and finish the look off with a matching lipstick and lip-gloss.

Check the mirror one last time and fix up any flaws before packing your makeup-tricks bag away.

Lip Magic; Tips for Lips


As we get older our lips get smaller and thinner — it’s a fact of life, but it need not be the end of the world or our attractiveness. If you don’t have the money or the inclination to run off and get collagen injections there are ways you can keep your lips looking great and desirable. By using simple techniques you can create illusions of larger, pouty and more balanced lips.

Lipstick looks best on smooth lips.
To keep your lips smooth use a lip exfoliant and always wear some type of lipstick or lip balm, especially wintertime or in the sun.


To start creating wonderful lips use lip liner.
Lip liner is a great tool that will keep your lipstick in place, define the shape of your lips and can make your lips look larger or smaller. Use a lip liner color that is lighter than your lipstick and keep the pencil sharp.


Use lip liner to outline the natural lines of your lips and then fill in the lips with a color that blends with your lipstick. This little trick will keep your lipstick in place. Never go outside the natural lines of your lips in an attempt to make your lips look larger. Lip liner will keep your lipstick away from the fine lines around your mouth, which will keep your lipstick from bleeding.

Start by defining the V using feathery, short strokes that are not too sharp. After you have defined and filled in the lips with liner, fill with color using either a lip brush or a tube. Blot with a tissue and reapply lip color. For a fuller look use a lighter color in the middle of the lip.

Tips for Lips:

* Matte is the longest lasting lipstick but can be dry.
* Gloss makes lips look fuller.
* For extra definition line lips once again after you have applied lip color.
* Balms have SPF’s.
* Sheer lipstick won’t last long.
* Neutral shades will match everything.
* Lips will look larger with a medium color.
* Moist lipsticks are more likely to bleed.

Do Your Hands Make You Look Older?


Hand Care

When you hear about wrinkles and skin aging, your first thoughts are about face and neck. But the earliest signs of aging will show on your hands.

Often neglected, hands need to be regularly taken care of. Frequent contacts with water and chemicals, sun, cold weather, gardening — all put your skin under a big stress. While hands do not have many oil glands, they will give away your age earlier than your pampered face. In the meantime, it has been noticed that after making eye contact, the next thing people pay attention to is your hands.

What can you do to keep your hands beautiful?

# Moisturize! Several times a day. Dry skin is easily injured and looks wrinkled.
# Protect your hands — wear gloves when gardening, washing dishes, or dealing with chemicals
# Use sun protection
# Keep your hands dry; any water left on your hands will evaporate and dry out the skin.
# Give your hands a special treatment — herbal or oil bath — once in a while.

Here are a few suggestions for your next hand spa:

Herbal hand bath


Bring 1 qt of water to boil and pour over 1 tbsp of herbs (you can use all of these or just one: chamomile, nettle, sage, coltsfoot, calendula). Let the infusion cool to 100-110F and soak your hands in it for about 15-20 minutes. Dry your hands thoroughly and apply a rich moisturizer.

You can make your own nourishing hand cream


Thoroughly mix 1 teaspoon of honey and 3 tbsp of unsalted butter. Add 1 tbsp of strong herbal infusion. This will make a very rich cream. It will take a while to absorb, but leave your hands silky and smooth.

For dry skin use this hand treatment 1-2 times a week


1 tbsp glycerin
1 egg yolk
2 tbsp vegetable oil (olive, almond, or another oil of your choice)
lemon juice of 1 lemon
3 1/2 – 4 oz of an herbal infusion (for example: chamomile, calendula, elderflower) or rose water.

Other tips


Mashed potatoes (with milk) will make a great hand mask.
When cooking with eggs, don’t throw the eggshells away. Scrape out the remaining egg white and spread it over your hands.
Rubbing your skin with a piece of lemon will give the skin a more even tone.
After washing dishes or dealing with other alkali detergents, rinse your hands with sour milk or with a vinegar-in-water solution (1 tbsp. vinegar per 2qt of water). This will help to restore pH balance of the skin.
Keep your hands warm. Not only for the sake of better skin, but for your overall health.
Flue and colds often start with cold hands.

Remedies for Chapped Lips


Lips


When you greet people, your smile is probably the first thing that catches their attention.

A smile, especially one that reaches the eyes, can be engaging enough to beckon someone’s interest and winning enough to hold their attention.

Oftentimes, people place all the attention on beautiful, white teeth that shine out through your smile. While this is important, the health of your lips is also important.

If your lips are sore and cracked, a smile can be painful and therefore, less engaging.

When you talk, your lips move constantly and therefore dry, cracked lips can create a desire to remain silent.

Do you ever think about how much depends or rests on your lips? Your lips are your gateway to so many different avenues. With them you can:

* Whisper sweet nothings into the ears of your loved one.
* Push away the boogieman as you sooth and comfort your little ones.
* Pray for peace for all of humanity.
* Extend love and kindness to the people you cherish.
* Offer encouragement, support, and guidance to those who need it.
* Provide thoughtfulness and generosity in a time of need.
* Invite the sandman to elicit sweet dreams while you slumber.
* Sing dulcet tunes to instill peace and harmony.

Winter can be a harsh companion, especially on our lips. Therefore, caring for our lips should be part of our daily routine. Many products are available to help prevent dry and cracked lips. First and foremost, avoid problems with daily care. Take the time to invest in a few products that will keep your lips smooth and delectable.

An ounce of prevention (once or twice a day) is worth a pound of cure (all day long).

Preventative measures can be as simple as:

* Applying a small coat of Vaseline or lip balm when using a dry lipstick.
* Using a bit of lip balm to moisturize as you sleep.
* Using a lip balm before going out into harsh weather, especially one with a good SPF factor to protect them from the sun’s rays.
* Drinking plenty of water to keep your lips hydrated and supple.
* Avoiding the use of lipsticks that can dry out your lips if they have become chapped.
* Resisting the urge to lick your lips (saliva does not moisturize).
* Resisting the urge to nibble at your lips.
* Using a toothbrush with soft bristles to remove flaky skin from your lips.

Remember that pain is unnecessary, lips that hurt can and should be avoided, and there are many products available to help us.

Lemon Nutrition Facts


Lemons are sour tasting fruit that form part of the citrus family. They are yellow or green in color and both the juice and rind are used in cooking, baking and may also be added to drinks for a zesty flavor.

About 5% of the lemon juice is acid. Its pH is around 2 to 3 and it is what gives lemons their sour taste.

Lemons are believed to have some heath benefits due to their chemical structure and unique flavonoid compounds. Lemons have anti-oxidant properties which are believed to fight off free radicals and cancer cells. According to old housewife's tales and now Ayurvedic medicine, having a cup of hot water with a squeeze of lemon juice has been used to release toxins from the liver.

Most notably, lemons are jam-packed with vitamin C. A mere tablespoon of lemon juice has 7 mg of the vitamin and is considered a source. A half-cup of juice meets 100% of the RDA for vitamin C. One lemon would also contain about 12 grams of carbohydrates, 1 gram of protein and 3 grams of sodium. Lemons contain no fat and no sugar.

In a research study, presented at the American College of Neuropsychopharmacology's Annual, 2004 Meeting, the inability to identify the smell of lemons was among the top ten smells that could predict Alzheimer's disease.

Like the other senses, the sense of smell is affected in dementia, but anecdotal evidence suggests that the ability to smell and identify some odors disappears faster than the other senses. The 10-smell odor identification system was founded to be a better predictor of Alzheimer's disease than the brain and memory imaging tests that are used as the standard.

Honey Nutrition Facts


Honey, the sweet, sticky substance created by a colony of bees, offers an excellent source of simple carbohydrates. For each tablespoon of honey consumed, the body is supplied with 64 calories of pure energy.

Honey is considered a natural substance, and according to the United States National Honey Board, it's a natural product that does not allow for the addition of other substances, such as water and sweeteners.

In the United States there are about 300 varieties of honey and each one differs depending on the floral source that the bees visit. Each type of honey not only has its own taste, but varies in color too. Generally, the lighter the honey, the milder the flavor.

Honey's composition, on average, is 17.1 % water, 82.4 % carbohydrates and 0.5 % proteins, amino acids, vitamins and minerals. The average carbohydrate content is mainly fructose (38.5 %) and glucose (31 %). The remaining 12.9 % of carbohydrates is made up of maltose, sucrose and other sugars.

Unlike most other sweeteners, honey contains small amounts of a wide array of vitamins, minerals, amino acids, and antioxidants. Vitamins in honey include vitamin B6, vitamin C, thiamin, niacin, riboflavin, and pantothenic acid. Essential minerals including calcium, copper, iron, magnesium, manganese, phosphorus, potassium, sodium, and zinc as well as several different amino acids have been identified in honey. One antioxidant called "pinocembrin" is only found in honey.

Honey is fat free, cholesterol free and sodium free.

Apart from its culinary and medicinal properties, honey has often been used as a metaphor by many famous people, including Abraham Lincoln who is quoted to have said, "The only reason for being a bee that I know of is making honey . . . and the only reason for making honey is so I can eat it."

10 Absolute-Don'ts of Great Hair Care


Hair care


If the amount of money consumers spend on hair care products annually is any indication, most people are concerned about the appearance of their hair and strive to attain beautiful, healthy and stylish locks. In fact, most will go to any lengths to achieve their desired look. From professional salon treatments to over-the-counter serums, hair care is a big business.

The only problem is that while many people are buying the right hair care products for their hair, they forget to follow basic hair care regimens that will guarantee the health and beauty of their tresses. Additionally, many are also causing needless damage to their hair by participating in unhealthy hair care behavior.

So, what should you do to make sure your hair stays healthy, shiny and strong? Here are 10 essential must-dos of great hair care.

Hair Care Tips: 10 Must-Dos and
10 Absolute-Don'ts of Great Hair Care

by: Michael Barrows
Hair care

If the amount of money consumers spend on hair care products annually is any indication, most people are concerned about the appearance of their hair and strive to attain beautiful, healthy and stylish locks. In fact, most will go to any lengths to achieve their desired look. From professional salon treatments to over-the-counter serums, hair care is a big business.

The only problem is that while many people are buying the right hair care products for their hair, they forget to follow basic hair care regimens that will guarantee the health and beauty of their tresses. Additionally, many are also causing needless damage to their hair by participating in unhealthy hair care behavior.

So, what should you do to make sure your hair stays healthy, shiny and strong? Here are 10 essential must-dos of great hair care.

1. Use the right hare care products for your specific hair type
2. Get a trim every 6 to 8 weeks
3. Use hair care products containing sunscreen
4. Shampoo your hair only when it is dirty
5. Turn to a professional for all of your hair care needs
6. Use professional conditioning hair coloring systems
7. Stick with one chemical service
8. Add texture
9. Choose hair color that compliments your style
10. Use a wide-toothed comb when your hair is wet

1. Use the right hare care products for your specific hair type

If your hair is damaged, dry or color-treated, use hair care products formulated to repair this damage and add much-needed shine and resiliency. On the other hand, if your hair is oily, use a deep-cleansing shampoo and light conditioner to keep your hair looking its best. The right products should be at the base of your hair care routine.

2. Get a trim every 6 to 8 weeks

Get a trim every 6 to 8 weeks as part of your regular hair care routine. Even if you are growing your hair longer, it is still vital to make a routine trim a major part of your hair care routine. Snipping ends before they split will keep your hair looking healthy and save you hair care headaches in the end.

3. Use hair care products containing sunscreen

Protect your hair with hair care products that contain sunscreen.

4. Shampoo your hair only when it is dirty

Contrary to popular belief, you do not need to shampoo your hair daily. Doing so can make your hair dry and hard to work with.

5. Turn to a professional for all of your hair care needs

Yes, kitchen beauticians and friends do not cost as much as putting your hair care needs in the hands of a qualified professional, but they often cause blunders that end up costing you more money than if you went to the salon in the first place.

6. Use professional conditioning hair coloring systems

There are many hair coloring systems on the market, and the ones you choose can have a great impact on your hair care costs. Simply put: choose a system that causes minimal damage and conditions hair as it colors. This will save you money when it comes to conditioning hair care products.

7. Stick with one chemical service

In order to keep your hair as healthy as it can be, ask your hair care professional to recommend only one chemical service: color or perm. By only using the service that is perfect for your particular style and needs, you will ensure that your hair stays healthier.

8. Add texture

By adding texture to your style, through perm or cut, you can greatly reduce the time it takes to style and perform your daily hair care routine. And you will look sensational.

9. Choose hair color that compliments your style

With all of the professional coloring techniques available, this part of your hair care regimen has never been easier. From chunky highlights to soft color, you can greatly enhance your style with the right technique.

10. Use a wide-toothed comb when your hair is wet

Comb your hair with a wide-toothed comb when it is wet to prevent breakage. The only time you should use a brush during your hair care routine is when your hair is barely damp or dry.

Ten Absolute-Don’ts of Great Hair Care

To avoid all hair care disasters, follow these 10 absolute-don'ts of great hair care.

1. Avoid unprofessional and over-the-counter hair care products whenever you can. Many of these only offer false hopes and promises.

2. Do not cut your own bangs. Leave all of your cutting needs, even bangs, to your hair care professional.

3. Avoid excessive sun, chlorine and salt water during the summer months. Excessive exposure can cause severe damage that is irreversible even if you use the best hair care products.

4. Do not use clarifying hair care products on your tresses more than one time per week. They can strip hair of moisture and essential oils.

5. Do not visit a hair care salon without first getting a referral from someone you can trust. Choosing a salon based on an advertisement or sale alone is very risky.

6. Do not purchase hair color that comes in a box.

7. Never stick with an outdated look because you are afraid of looking different. Styles change for a reason. Ask your hair care professional to bring you into this decade with a new style.

8. Do not straighten your hair with a clothes iron. C'mon, this was so over in the 70s. We have straightening irons now that won't damage your hair. Look in the hair care isle.

9. Don't brush your hair or put too much tension on it while it is still wet. This will cause breakage. Also, do not wear tight styles such as cornrows for extended periods of time unless you have ethnic hair.

10. Never use sun-lightening products such as lemon juice or over-the-counter hair care products designed to lighten hair with the sun unless you want a very short hair cut in the future.

In the end, hair care is a very individualized and personal thing. Feel free to add your own flair and style to your hair care routine, but remember to include hair care principles that will benefit your hair and avoid those that damage it.

No Fail Blow-Drying for Smooth, Shiny Hair


Want that silky, touchable hair that Pantene Pro V products claim their shampoo will give you? Look no further. You can have that flawless look by spending only a few extra minutes blow-drying your hair! Ditch the designer hair products and follow these simple instructions to give your hair the same beautiful look a
nd soft feeling:
Materials:
* Towel

* Hairdryer
* Brush / comb

* Claw-clip or barrette
* Your usual styling products or a small amount of hair gel for touch-ups. (These may not be necessary after you try this tip.) Step 1: Twist hair up into a towel in order to remove
excess water. How long you keep it wrapped in the towel is up to you. My hair is long, so time permitting, I keep it like that for about 15 minutes. Step 2: Comb out any tangles and part hair as you wish. Step 3: Gather hair and twist except for a thin layer at the base of your head. Pin hair atop your head with the clip or barrette. Step 4: Begin drying the loose hair. (You can use a lower heat setting if you do not have a time restriction.) When hair is completely dry, turn off hairdryer and brush or comb hair. Step 5: Remove clip and take another section of hair to be dried. Re-twist your hair and replace pin. Step 6: Repeat step 4 as necessary. For thicker hair, you may need to separate hair into sections several times. My hair is of a medium thickness but long, so I separate it into 3 sections. Step 7: Once hair is completely dry, brush and style as you wish, or leave it down, as it should be less dried-out and more manageable. If your hair is not completely frizz-free and cooperative, rub a small amount of gel in your hands (a nickel's worth or a quarter's worth) and gently smooth over your hair, paying close attention to the ends. Drying and styling time will vary based on your hair's thickness and length. Though I do not always have enough time to use this drying technique, it works wonders for my hair for those special occasions! Approximate time required: 10-20 minutes, depending on thickness and length of hair.

How to Treat Greasy Hair


If you suffer with greasy hair, you know that it can be quite embarrassing, not to mention difficult to keep it clean and looking good.

Greasy hair can happen to anyone and can be made worse by the wrong hair washing procedure. Greasy hair is the result of build up caused by the natural secretion of your sebaceous glands in the scalp.

When you over-stimulate your sebaceous glands, they send out a signal to release more oil into the hair, resulting in greasy hair. It is a never-ending vicious cycle, causing you to want to wash your hair more often; however no matter how many times you wash your hair, it looks greasier and greasier.

To stop this vicious cycle, use a specially formulated oil-free shampoo and try not to condition your hair with every wash. If you absolutely must condition your hair, do not rub it into your roots; only apply a small amount of product onto your ends.

Steer clear of any 'added moisture' shampoos and products as these are designed to leave more oil on your hair, and should not be used unless you have dry, straw like hair.

When you apply shampoo, gently apply it into the scalp and leave it on for a few minutes before rinsing it off. Do not use deep massaging techniques as these simply aggravate the sebaceous glands further.

Avoid touching your hair too often and vigorous brushing as both of these contribute to the stimulation of the sebaceous glands and also spread the oil from the scalp throughout the hair.

Unfortunately there is no 'cure' for greasy hair. However, with the right shampooing, minimal conditioning and avoiding any products that cause unnecessary grease build up you can avoid greasy hair.

How to Get a Perfect Hair Cut


The right hair cut can mean the difference between hours spent coercing every strand of your wayward hair into place or a style that falls perfectly into place with little prompting on your part. That is why it is so important to make sure that you have the perfect hair cut for your type and texture of hair.

For most people, finding the right hair cut is not possible by simply looking through a few hair cutting books and picking out their favorite styles. The truth is that hair cuts featured in the top style magazines and style books have been chosen specifically for each model that sports them. Each hair cut and style has been formulated to compliment the model’s bone structure, coloring and hair texture. That is why they look so great.

It would be foolish to think that a straight, textured cut would be possible to achieve on a client with natural curly hair. And trying to put excessive layering on a client with thin and limp hair would result in a disastrous hair cutting experience. So, what can you do to make sure that you always get a great hair cut?

The first step to great hair cuts is finding the right stylist. Once you find a stylist with a proven record and one with whom you are comfortable, take some time to talk about what you want out of your hair cut. Ask for cuts and styles that will compliment and work with your texture of hair, and that do not go against it. For example: If your hair is wavy, you cannot expect to achieve a sleek straight style in minutes. Nor can you expect to achieve a bouffant style on fine, limp hair in a matter of minutes.

Pay attention to how your stylist communicates with you. A good stylist will be honest with you and tell you if a cut that you want is a bad idea. On the other hand, the same stylist can use their unique hair cutting skills to adapt popular styles to suit your individual hair characteristics and craft your locks into the best hair cut you’ve ever had.

Along with your stylist, browse through hair cutting and style books and discuss different hair cuts that caught your eye. Try to look for models with hair similar to yours. It is also very important to pay attention to face shape. So, choose models with bone structures similar to yours also.

What to do when a good hair cut goes bad…

Sometimes, even people who have done all of their homework get bad hair cuts. Maybe they’ve chosen a stylist with an approach to hair cutting that is not ideal for their hair type. Or maybe they’ve insisted on a hair cut that does nothing to flatter their features. Or worse yet, maybe they got a botched hair cut from an inexperienced stylist. No matter what the reason, a bad hair cut is not the end of the world. There are things that you can do to make the recovery from a bad hair cut less painful.

While it may seem strange, the first thing you need to do after receiving a bad hair cut is to go and get another one. Find a stylist who can smooth out the rough edges and carve your locks into a style that is more suited to you and more suited to the growing-out phase.

Do not stop at additional hair cutting; ask your stylist to help you find the right products to keep your tresses under control while they are recovering. Yes, it is frustrating, but in a few weeks you probably will not mind your new hair cut. You may even grow to like it.

Garlic Nutrition Facts


Garlic, which is used around the globe to add flavor and taste to a wide variety of dishes, is a member of the Amaryllis family. Other vegetables in this family include onions, shallots and leeks.

Garlic has been used in both foods and in the creation of certain medicines, and dates as far back as the Egyptian pyramids.

In culinary uses, garlic is often added to foods for its pungent flavor and may be used to enhance the flavor of other dishes. Depending on how much is used and the type of cooking method, garlic may either present a mellow or intense flavor. The bulb of the garlic plant may be eaten raw or cooked, while the leaves (raw or cooked) may be chopped up and added to salads.

Garlic is an excellent source of manganese. It is also a very good source of vitamin B6 and vitamin C. In addition, garlic is a good source of protein and thiamin (vitamin B1) as well as the minerals phosphorous, selenium, calcium, potassium, iron and copper.

Garlic contains the amino acid, alliin, which scientists say has antibiotic and bactericidal effects. It is believed to promote cardiovascular activity and have a soothing effect on the respiratory system.

Apart from these uses, garlic has also been known as a stigma of superstition and has been regarded as both a good and evil force. However, it is most commonly known as a tool used to ward off vampires.

The Importance of Free Weights to Your Fitness Program


While there are no shortage of complicated and expensive exercise gadgets on the market, one of the most effective ways to exercise is also one of the simplest to use and most inexpensive to buy. Those simple to use, highly effective and inexpensive exercise helpers are known as free weights.

Free weights are an essential part of any quality workout program, and a combination of dumbbells, weight plates and barbells are essential to any well-stocked home gym.

Like all types of exercise equipment, free weights come in a number of different varieties, and of course in a wide range of prices. For instance, there are hex dumbbells, chrome dumbbells and weight benches. Weight benches can of course be used in conjunction with weight plates for a varied workout. Weight benches with a variety of different weight plates are a great way to provide yourself with continual challenges as your fitness level grows.

There are a number of accessories that can make free weights and weight benches even more useful and effective. These accessories to free weights include weight lifting gloves and a quality weight lifting belt. These accessories can help to prevent injuries, as well as providing a more comfortable workout.

For those seeking the lowest investment while still getting a quality workout, it is hard to beat the cost efficiency of free weights. One quality set of dumbbells and some extra weight plates can provide a variety of different workouts, all for a cost of between $50 and $150.

For those with more room and more money, there are weight lifting benches that can be adjusted from totally flat to inclined. In addition, most weight lifting benches also come with attachments to do leg curls and leg extensions, as well as stands which allow the exerciser to use the barbells to do bench presses.

No matter what kinds of free weights you decide to buy, the addition of weight plates can serve to increase both the variety and the intensity of any workout. Weight plates are inexpensive to buy, and they can be used with weight benches, or attached to free weights to increase the intensity of the workout. Every set of free weights should include a variety of plates in a variety of different weights.

Food Combining Guide

Like a horse and carriage, to be in a successful relationship, you and your partner must be compatible. The same theory applies to food. In order to achieve the maximum benefits from your diet, combining the right foods will help your body, specifically your digestive system work in harmony.

Food combining basically means consuming foods that are compatible with each other within the digestive system. By combining foods that compliment each other, your digestive system is able to function optimally. It has been said that different food groups seek different digestion times and knowing this can help you plan your meals more effectively.

One of the golden rules of food combining is to avoid mixing protein and starch at the same meal. These foods have different digestion properties, and mixing them up could hamper with and slow down the digestion process.

Other food combining tips:

* Don't eat starches or proteins with acidic foods such as tomatoes. The acidic foods neutralize the alkaline that is required to digest and may result in fermentation and/or indigestion.

* Proteins and fats should also be eaten at separate meals. Both fats and proteins require hours in order to digest. When eating protein, try to remember that, at a time, your body only needs a portion (that is about the size of your palm or clenched fist) unless you are on a specific diet recommended by a doctor or dietician.

* When eating a protein source, try not to mix it with another protein source.

* When eating fruits, try not to mix them with either carbs or protein sources. The digestion of fruit is slowed down when combined with other food sources.

Get Flawless Skin


Flawless Skin

Everybody wants flawless skin. The good news is you don't have to go to extremes to achieve it. We show you how…

Not only does clean, healthy skin make you look and feel better, but it is also an indicator that you are in good health. While there are a lot of products out there to rejuvenate, hydrate or clear the skin, nothing is as important to healthy skin as a good, clean, nutritious diet.

Unfortunately, there is no treatment for aging skin, but taking care of your skin today will no doubt help it to look better, more radiant and above all healthier. Stock up on lots of fruit and veggies and eliminate all processed foods from your diet. Fish such as salmon and haddock have been associated with good skin while nuts are great snack-sized bites that contribute to healthy, more radiant skin.

In addition to eating good, clean foods, water is essential in maintaining that healthy, glowing skin. Water helps to flush out the toxins in your body; some of these, such as acne, may appear on the face. Water also helps to hydrate the skin, making it feel and look years younger. Ideally, you should consume a minimum of eight glasses of water a day.

Another sure-fire way to get the skin looking great is to invest in a quality skincare range, ideal for your skin. Whether you have dry skin, oily skin, normal skin or combination skin, using the product that works for your skin is an absolute must. The bigger, more reputable skin companies will be able to advise you on which product is best. However, before you buy, ensure you try the product for a few days to see how your skin reacts to it. Ask your beauty consultant for a trial-sized cleanser, toner and moisturizer. If they refuse to give these to you, try another house.

In closing, if you are following a good diet and taking care of you skin, but are still not seeing the results, consult with your dermatologist for a more professional opinion.

Egg White Nutrition Facts


Egg

In a raw egg, the egg white would be the clear white liquid. Its main purpose is to protect the egg yolk and provide it with the nutrition necessary for growth. For this reason it is packed with high levels of protein and many health enthusiasts separate it and consume it as a source of protein.

The egg yolk (yellow portion) on the other hand, is filled with cholesterol (a

One large, thirty three gram raw, fresh egg white would pack in 17 calories with zero fat and zero cholesterol. It also has zero carbohydrates, about 4 grams of protein and 55 milligrams of sodium.

Egg whites are commonly used in meringues and soufflés; however, they provide a versatile protein source for those seeking a highly nutritious protein source. It can be fried, scrambled and boiled. It may also be used in omelettes and sometimes it is eaten raw.

type of fat) and is considered to be unhealthy.

Ear Acupuncture for Weight Loss


When Polish researchers examined acupuncture as a diet aid, they found that people who got needled lost ten more pounds and tickled two additional points off their BMIs compared with those who merely cut calories.

Acupuncturist Marie Cargill explains that pressure points on the body — mostly on the ear — work as a switchboard to the brain, triggering electrical pulses that suppress appetite. “The ear system is very effective for addition treatment,” she says.

Dealing with Skin Dryness


Skin Care

Dry skin has a parched look caused by its lack of ability to retain moisture. Characteristics of dry skin are fine pores, dryness, fine lines, roughness, tight, uncomfortable feeling, and dull appearance. If your skin feels the same, it's a fair bet you've got a dry complexion.

Dry skin is caused by too little sebum in the lower levels of skin and too little moisture in the upper levels. It feels tight and itchy after washing. It requires soothing care to look its best. It is essential to take proper care to hydrate it. Only then you can begin to enjoy a new, softer skin.

Dry skin is very reactive to the environment and hates extremes of cold, heat and wind. It tends to peel and has a tendency to premature aging with the emergence of fine lines and wrinkles. There is a difference between a dehydrated skin and a dry skin. While the dehydrated skin is simply thirsty, dry skin needs extra care in adapting a beauty regime to nourish the weakened corneal layer. While dealing with dry skin, your objective should always be to restore tone to the lipids in the corneal layer.

Every dermatologist's advice: you must cleanse according to your skin type. Dry skin must be cleansed without removing the skin's protective film. So you should opt for a thick milk cleanser and rinse with flower water. Your moisturizing cream should be rich in repairing agents containing ceramides, which reduce the salt content and slow down the evaporation of water in the skin.

Face masks for dry skin:

1. Mix 2 tablespoons honey with 2 teaspoons milk. Smooth over face and throat. Leave on for 10 minutes. Rinse off with warm water.

2. Mash apricots, mix it with warm olive oil to form a paste. Apply it on your face and leave it for 10 minutes, then wash off.
Some helpful tips for dealing with dry skin:

1. Drink one and half liter of water every day to retain the hydration rate of your skin cells. Also, it benefits your overall health.

2. Maximize the effects of hydration by adding the essential oil, angelica, to your day and night creams.

3. Make sure to abandon water-based cleansers.

4. Try iris flower, as it is excellent for retaining moisture in the skin.

5. Always opt for creams with ceramides.

6. Eat a balanced diet including fresh fruits and vegetables.

7. Stay away from soft drinks, sugar and other junk foods.
Homemade solutions for dry, flaky skin:

1. Place a sprinkling of sugar in your palm and dampen with water. Gently massage on the flaky areas. Rinse.

2. Rub half of an apple on skin to help even out the texture.


OTHER RESOURCES:


Dry Skin
Dry skin has a low level of sebum and can be prone to sensitivity. The skin has a parched look caused by its inability to retain moisture. It usually feels "tight" and uncomfortable after washing unless some type of moisturizer or skin cream is applied. Chapping and cracking are signs of extremely dry, dehydrated skin. Dryness is exacerbated by wind, extremes of temperature and air-conditioning, all of which cause the skin to flake, chap and feel tight. This type of skin is tightly drawn over bones. It looks dull, especially on the cheeks and around the eyes. There may be tiny expression lines on these spots and at the comers of the mouth. Read more…

Dry Skin (Xerosis)
Dry skin, also called xerosis, is a common problem. Your skin needs moisture to stay smooth and supple, and retaining moisture is especially difficult in winter. Central heating of home and other buildings is very drying to the skin. Simple daily routines, such as bathing and towel drying, may actually remove moisture from the skin. Modifying your bathing routine will help preserve your skin's moisture. Bathing provides the skin will moisturize temporarily, but it removes the skin's oily lipid layer and in the long run causes more moisture loss than gain. Read more…

Dry Hair Care: Dealing with Dry, Frizzy Hair


Keeping your hair smooth and shining is not always as simple as the television ads would have us believe. Find out what causes dry, frizzy hair, and learn how to deal with it.


Dry, brittle and frizzy hair is a result of hair that lacks moisture, or water. This hair condition is most common among chemically treated hair, as the chemicals often strip your hair of its natural moisture. People who have naturally curly hair may also, at times, find the frizz unbearable.

This type of hair requires a lot of attention and even more tender, loving care. Start off by using shampoos that are designed specifically for your hair type. This will ensure that some of the moisture remains in your hair, and will give it a silky, sleek texture.

Quick at-home treatments

* If your hair is extremely dry, you can add a few drops (no more than three) of safflower oil onto your palms, and gently blend it into your hair. Do not start at the roots, rather go from the ends of the hair and work your way upwards in a scrunching motion.
* Other products include silicone blends, which work really well too. Towel-dry your hair and bend over, flicking your hair forward. Rub a few drops of silicone treatment into your palms and, using your finger, blend it into the hair.

Both of these techniques can help you manage your dry, frizzy hair a little better. If you still find that your hair is unmanageable, chat with your hair stylist. They will be able to recommend salon specific treatments or products that will help.

Dieting for Weight Loss: How Successful Is It?


Dieting for weight loss is the most unsuccessful health intervention in all of medicine, says Dr. Brian J. Sharkey in his book Fitness and Health.

"Only 10% of people who have lost 25 pounds or more will remain at their desired level. Worse yet is the fact that many weight-loss programs have contributed to obesity. The truth that has emerged from the last decade of research is that diet alone won't help you achieve permanent weight loss. What will? The active life, combined with healthy food choices, and behavior therapy if necessary, is the answer to lifelong weight control. Activity maintains or builds the lean tissue (muscle) that has the capability to burn calories. Diet, by itself, leads to the loss of muscle and a reduction in daily calorie expenditure, resulting in an increased storage of fat."